How to change the default save location of Excel files for convenient data management

How to change the default save location of Excel files for convenient data management: By default, Excel is set to save files in OneDrive (for versions 1016 and later) or Documents (for versions 2013 and earlier). This can be frustrating for some users who have to go through additional steps to choose a different save location or copy the file from the default folder to a new location. Both methods are time-consuming and inconvenient. However, you can easily choose a different default save location for Excel files to make it more convenient for you to track them. If you’re not sure how to do this, please read on.
Step 1
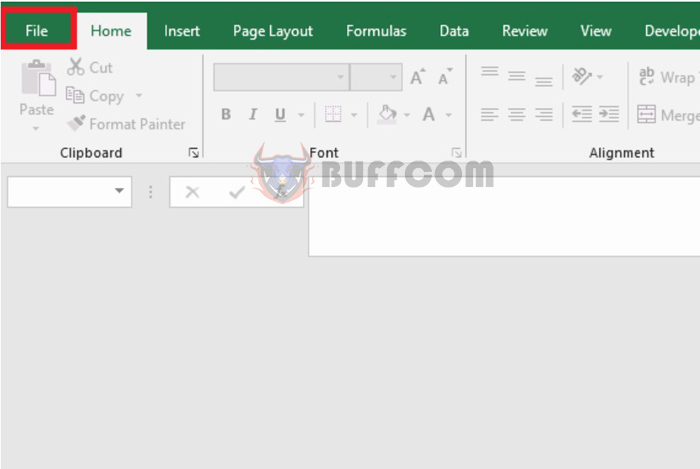
To change the default save location of Excel files, first open any Excel file. Then select the File tab on the toolbar.

How to change the default save location of Excel files for convenient data management
Step 2
Next, in the File interface, select the Options button in the lower left corner of the screen.

How to change the default save location of Excel files for convenient data management
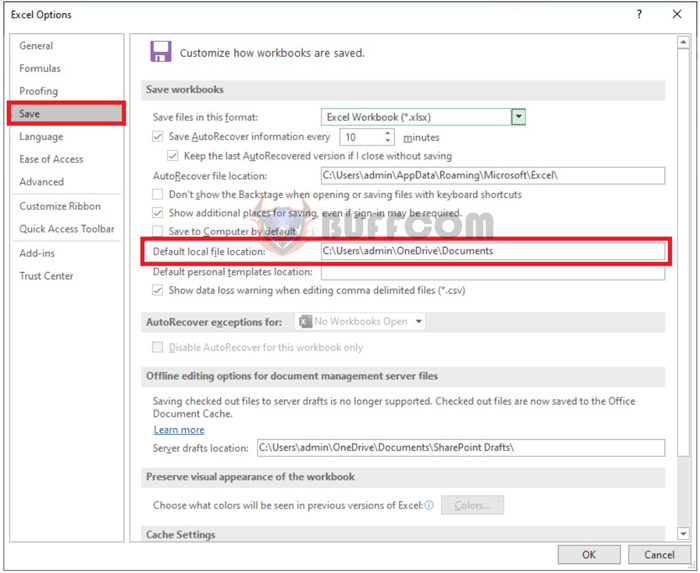
Step 3: Now, the Excel Options window appears.
Select the Save tab in the left-hand category. Then, in the Save workbooks section, you can see the default file save location that Excel is currently set to. In this case, my Excel is currently set to save files by default in the folder: C:\Users\admin\OneDrive\Documents.

How to change the default save location of Excel files for convenient data management
Step 4
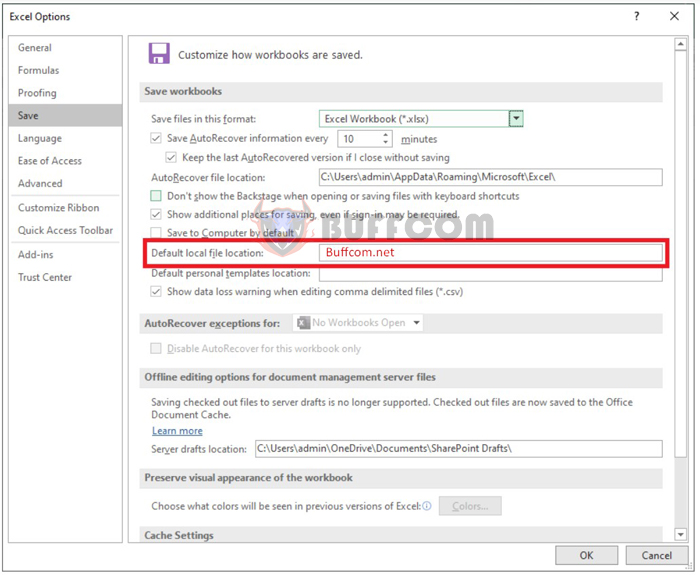
To change the default save location, simply click on the Default local file location and delete the old location. Then, enter the new location that you want to set. For example, in this case, I have deleted the old location and entered the new default location for saving Excel files as the folder D:\Buffcom.net. Finally, click OK to complete the setup. From now on, every time you press Save to save a new Excel file, it will be saved by default in the Buffcom.net folder on drive D if you do not choose a different folder to save it in.

How to change the default save location of Excel files for convenient data management
That’s it! This article has shown you how to change the default save location of Excel files. We hope this article will be helpful to you in your work. Good luck!


