How to Create a Watermark in Word to Protect Copyright

Do you want to protect your copyright or add a personal touch to your Word documents? Creating a watermark in Word will help you do just that. In this article, Buffcom.net will guide you on how to create a watermark in Word! Read and share if you find it helpful!
There are two main ways to use a watermark: Creating a logo/image watermark and creating a text watermark.
Steps to Use an Image to Create a Watermark in Word
Step 1: Select the Design tab.
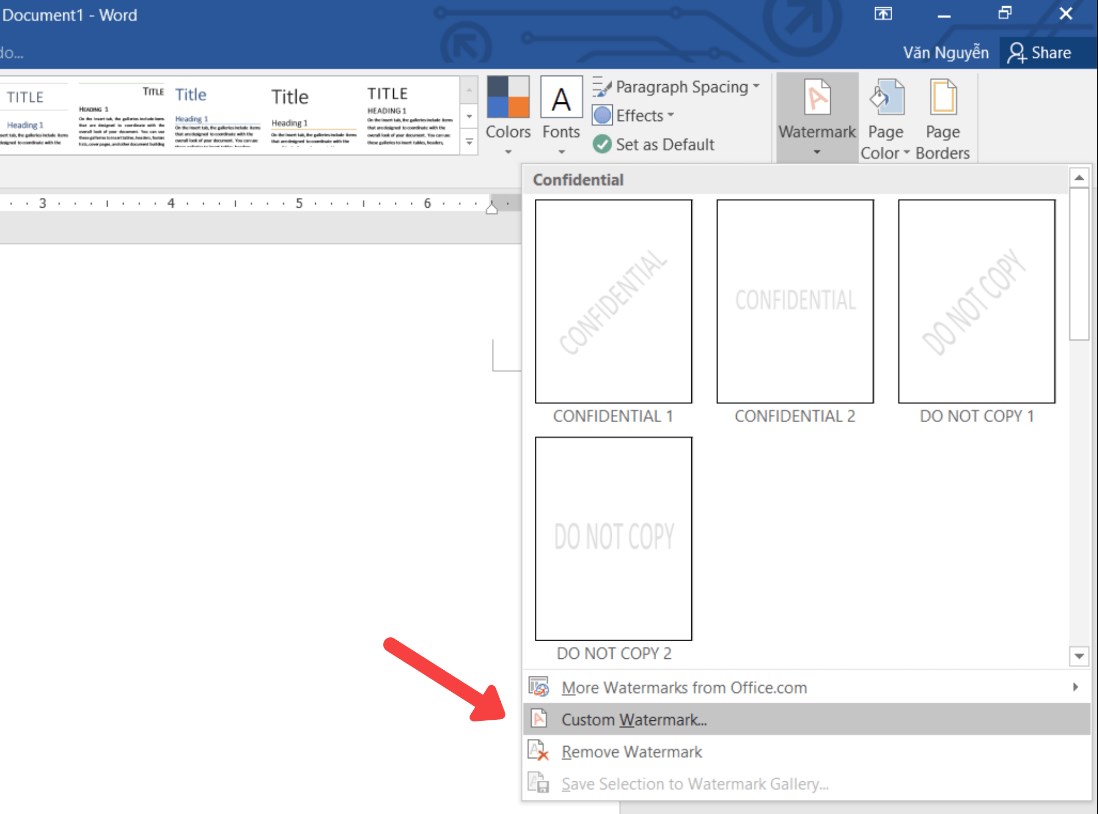
Step 2: Select Custom Watermark from the Watermark menu.
How to Create a Watermark in Word
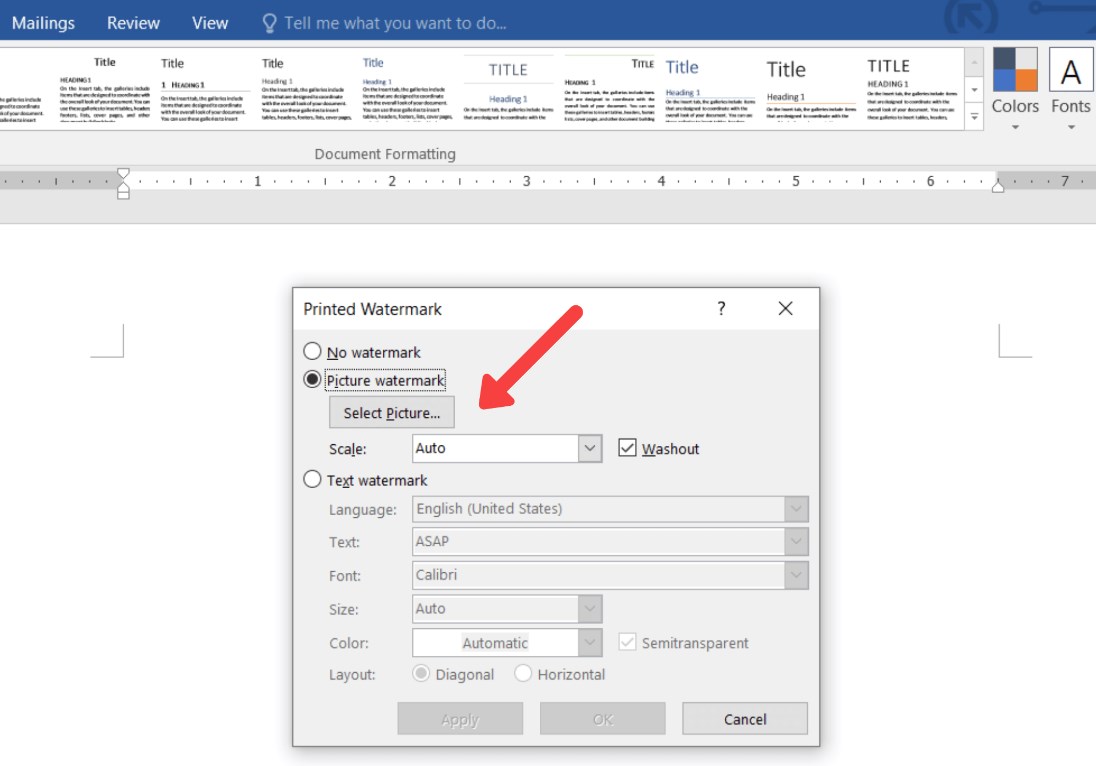
Step 3: In the Printed Watermark dialog box, select Picture watermark.
How to Create a Watermark in Word
Step 4: Click the Select Picture button to choose an image.
Step 5: In the Insert Picture dialog box, locate the image you want to use, click Insert to confirm its use.

How to Create a Watermark in Word
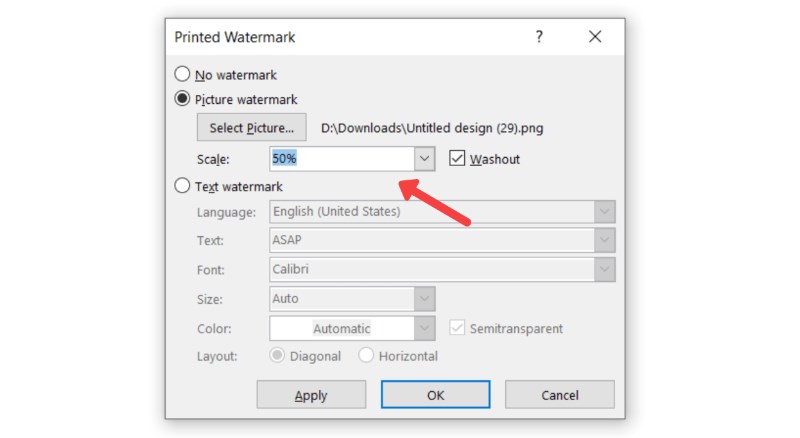
Step 6: Set the stretch by Scale and choose Washout to create a faded effect if necessary.
How to Create a Watermark in Word
Step 7: Click Apply to confirm. You have now created an image watermark in Word quickly.

How to Create a Watermark in Word
Steps to Create a Text Watermark in Word
Step 1: Select the Page Layout tab.
Step 2: In the Page Background group, select Watermark.
Step 3: In the Watermark menu, choose the type of faded image you want to use.
Step 4: To create a custom text watermark, select Custom Watermark.
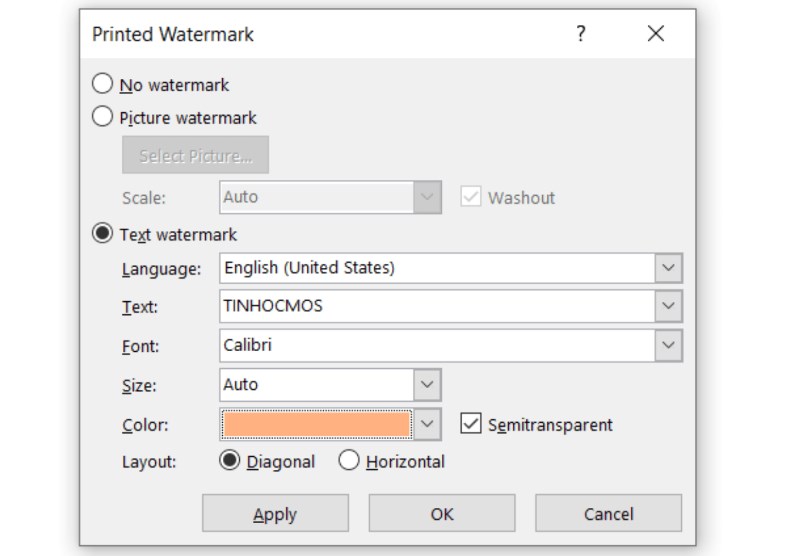
Step 5: In the Printed Watermark dialog box, select Text watermark.
How to Create a Watermark in Word
Step 6: Enter the required parameters for the Text watermark.
Step 7: Click Apply to confirm, or click OK to confirm the placement of the watermark and close the window.

How to Create a Watermark in Word
How to Remove Watermark in Word
Note: You can only remove a watermark in Word if you created that watermark yourself. If the watermark is from another source, you won’t be able to create it. That’s why watermarks are effective in protecting copyright.
To remove a watermark, select Watermark -> Remove Watermark.
Conclusion on How to Create Watermark in Word
Now you know how to create a watermark in Word to avoid copyright infringement and to add a personal touch to your documents. It’s really simple, isn’t it? We wish you success!
In addition, if your job is closely related to office computing, but your software doesn’t meet your needs, please contact Buffcom.net to choose the software you need!


