How To Create A Table Of Contents In Word
How To Create A Table Of Contents In Word is an essential skill to master after finishing an essay, a research paper, or a thesis. Adding a table of contents is a crucial step in finalizing your writing and making it appear more scholarly, which is highly regarded. Despite this, a lot of individuals still create their table of contents manually, leading to a time-consuming and laborious process. This article by Buffcom.net aims to provide you with a comprehensive guide on how to create a table of contents in Word 2013, which is efficient, straightforward, and time-saving..
To create a Table of Contents in Word, you can follow these 3 steps:
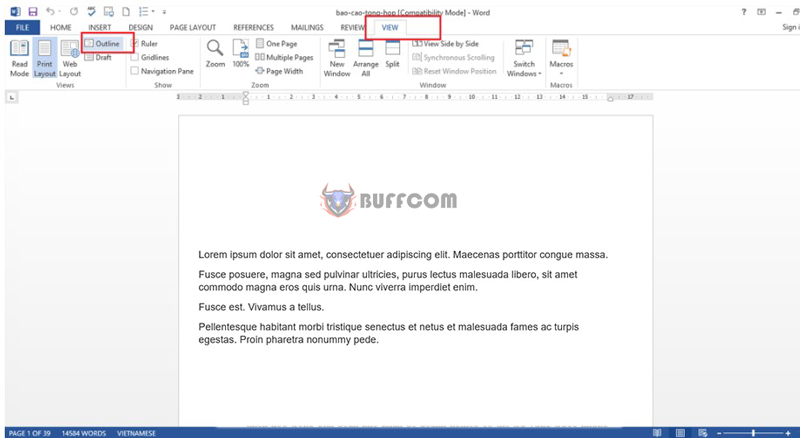
Step 1: Go to View -> Outline.
After opening the document file, on the toolbar, click on View -> Then click on Outline.
 Step 2: Set Level for the Headings in the Table of Contents
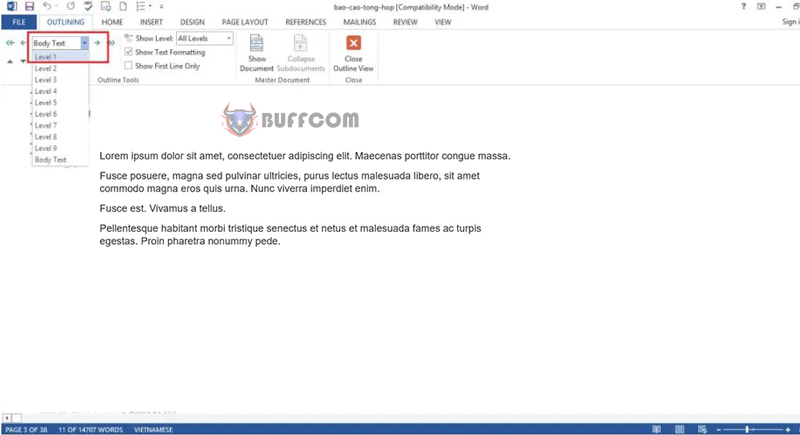
At this point, your document will be displayed in Outline form -> Place your mouse at the headings you want to display in the table of contents and set the level for it.
Specifically, the largest heading is level 1, and the smaller headings are lower levels.
Note: Remember to set the content of the heading to Body text.
 Step 3: Create a Menu for the Document
After setting the level for the headings, you will create a menu for the document.
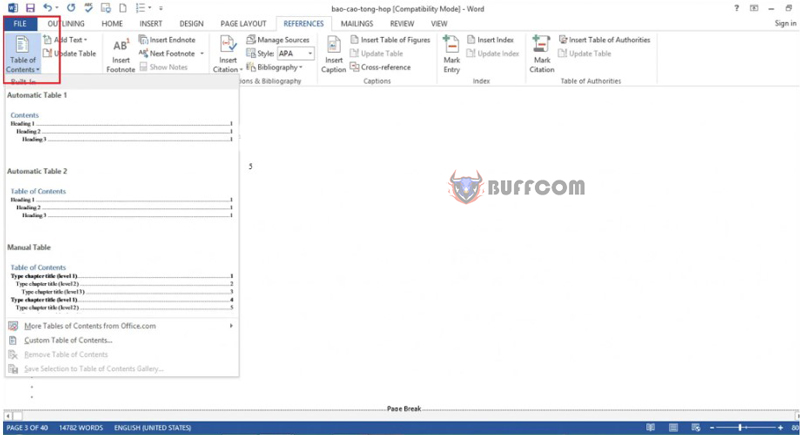
Place your cursor at the page where you want to create the table of contents -> Go to the References tab on the toolbar -> Click Table of Contents -> Choose the template you want.
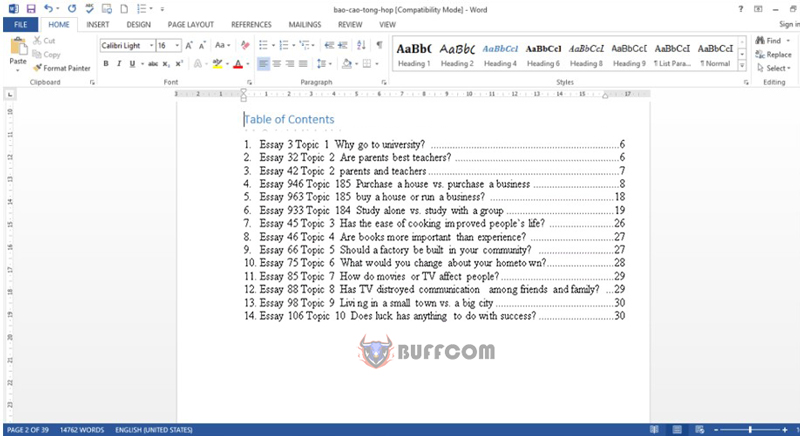 In summary
The article has provided detailed instructions on how to create a table of contents in Word.
3 steps to create a table of contents in Word:
Step 1: Go to View -> Outline
Step 2: Set Level
Step 3: Create a menu
We hope our contribution will help you to some extent in dealing with difficulties when creating a document in Word. Good luck!
Furthermore, if your job is closely related to office software but the office software does not meet your needs, please contact Buffcom.net to choose the software you need.

