How to Reset Windows 10 to Factory Settings When Forgot Password
Typically, we set a user password to prevent unauthorized access to our computer. It’s important to remember passwords like this because without them, you’ll be locked out of your PC.
In case you have lost or don’t have the login password for the user account, you can reset the PC to its factory settings. This won’t necessarily delete all existing data, as you have the option to recover data when performing a reset on your computer. Additionally, this method is also effective when you don’t have a USB or a new Windows 10 installation device.
Resetting Windows 10 to Factory Settings from the Login Screen
If you don’t have the admin password for your Windows PC, you can easily reset Windows 10 to its factory settings from the login screen.
Step 1. At the bottom right corner of the login screen, you will see various options, click on the Power button. To initiate the PC reset, hold the Shift key on your keyboard and then click on Restart.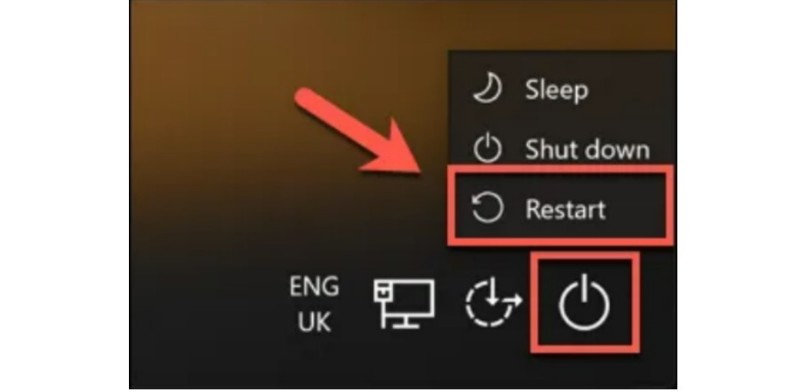
Step 2. This action will restart Windows 10, but instead of loading the operating system as usual, you will see a boot options menu. Click on the Troubleshoot option to proceed.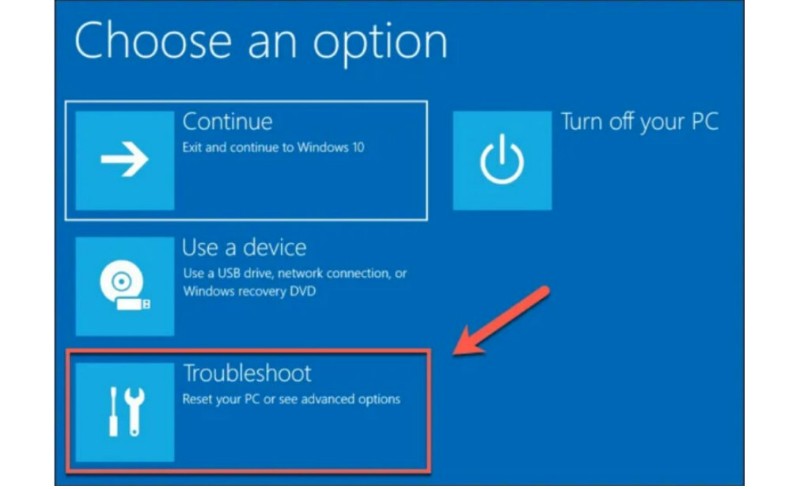
Step 3. In the Troubleshoot menu, click on the Reset this PC option.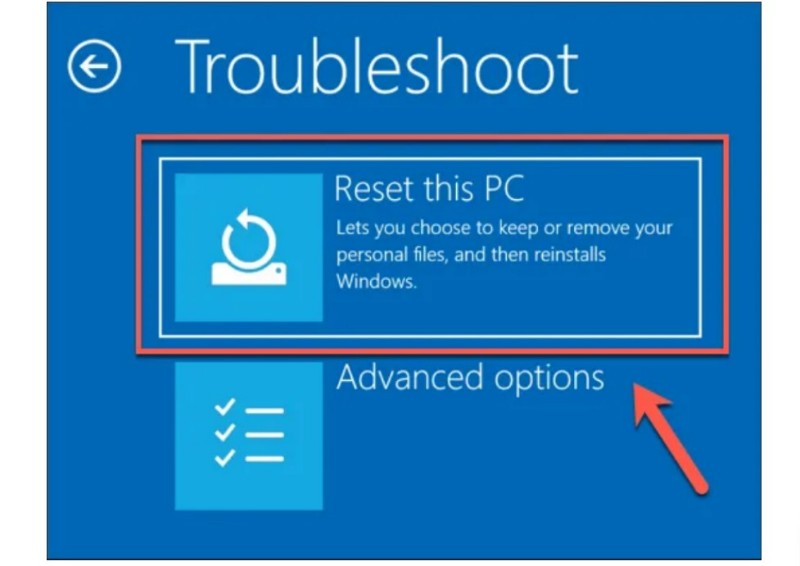
Step 4. You can choose to keep your files or delete all files and settings. To keep your data, click on the Keep my files option. Otherwise, click on Remove everything.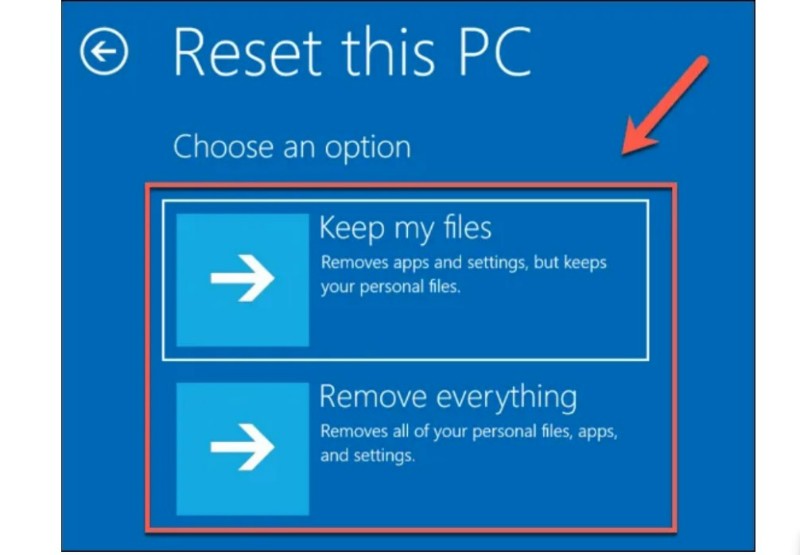
This action will start the reset process, and you may need to follow additional on-screen instructions to proceed. Once the process is complete, you will be able to set up your Windows PC with a new user account, completely bypassing the old admin password.
Using a Windows 10 Installation USB to Restore or Reinstall Windows
The simplest method to restore your Windows 10 PC to its factory settings without needing an admin password is to use the method described above. However, if your computer is experiencing issues and you can’t access Windows, you can use a Windows 10 installation USB to restore or reinstall the operating system.
You can obtain a Windows 10 installation file in ISO format from the Microsoft website. Then, you can create a DVD or a Windows installation USB (8GB). If you have access to another computer running Windows 10, you can use the Rufus flashing tool to create a Windows 10 installation USB.
Linux users can use WoeUSB to perform this task, while macOS users can utilize the Boot Camp Assistant tool that comes pre-installed on all Mac devices.
Creating a Windows 10 Installation USB with Rufus
Note: Make sure to backup any data on the USB as this process will erase it completely.
Step 1: After downloading the Windows 10 ISO, install and run the Rufus tool.
Step 2: Select your USB drive in the Device dropdown menu, then click on the SELECT button.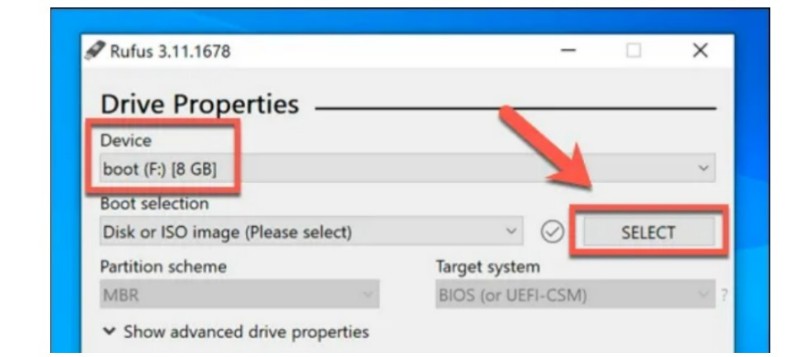
Step 3: Locate and select your Windows 10 installation ISO file, then click on Open.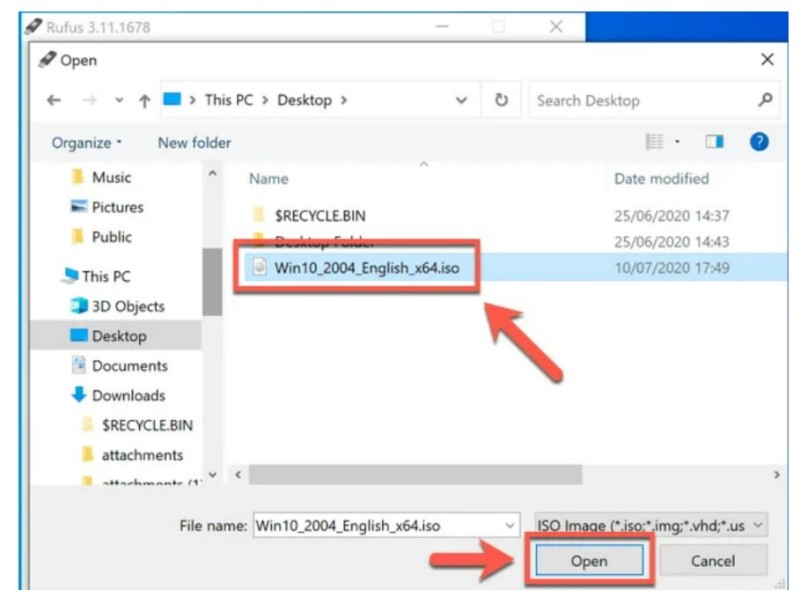
Step 4: Rufus will automatically perform its tasks. Simply click on START to flash the disk. Wait for the process to complete.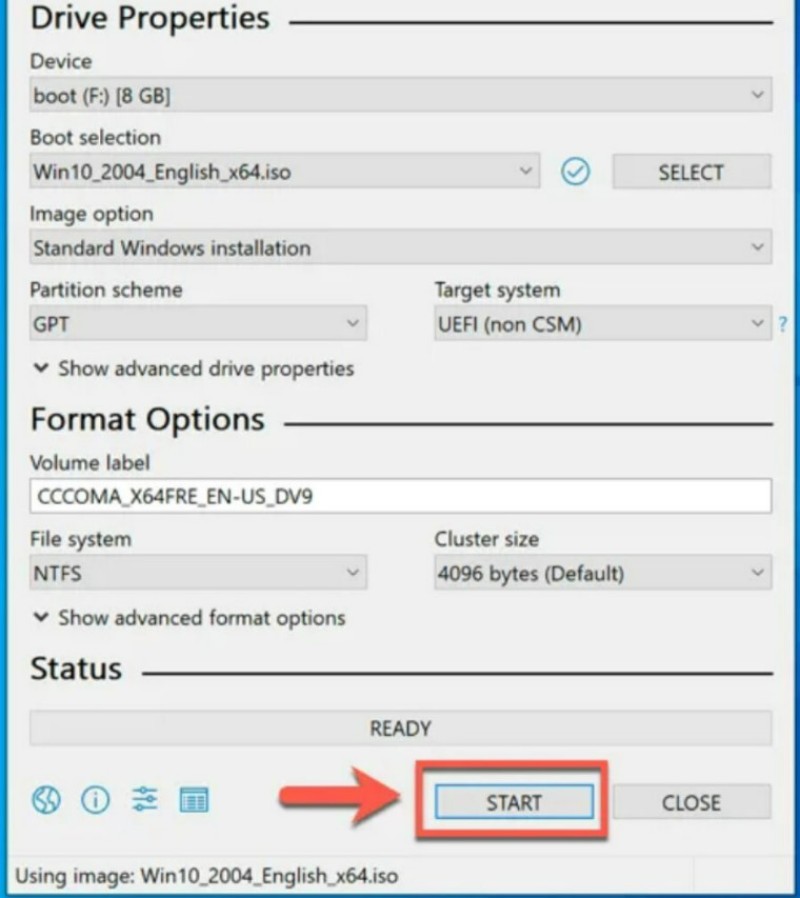
Restoring or Freshly Installing Windows 10 from the Installation USB
Before proceeding with the following steps, you need to set your computer to boot from the USB.
Step 1: Boot your computer from the Windows installation USB. On the main interface, you can choose the language, time, keyboard layout, or leave them as default. Then click on Next.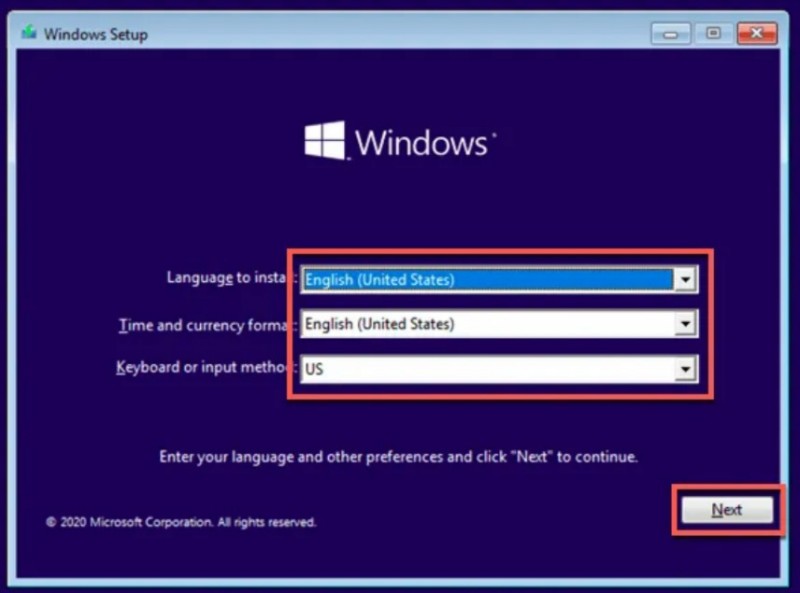
Step 2: Now you have two options: Click on Repair your computer to proceed with restoring the factory settings. For the next steps, refer to part 1 of the article. Click on the Install now button to start the fresh installation process of the operating system.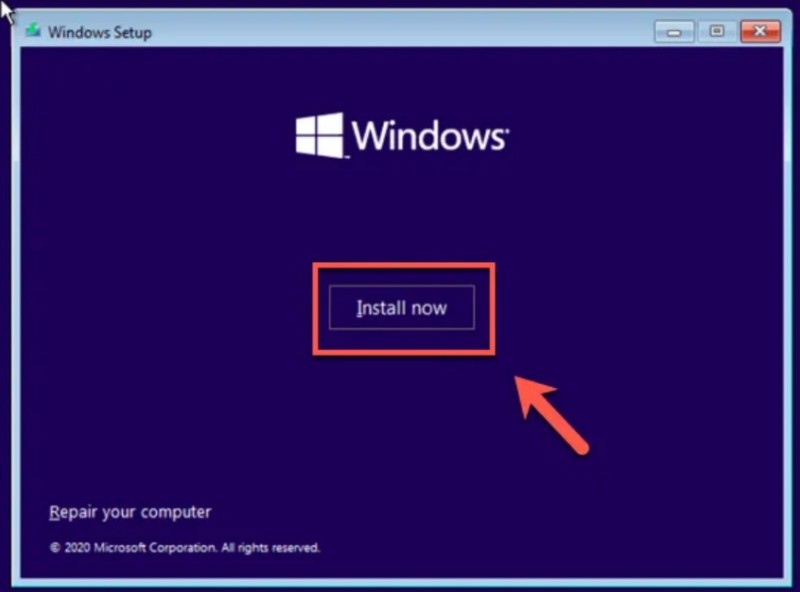
Step 3: The Windows installation files will be loaded at this point. You can enter the Windows 10 key to activate the license immediately, or choose I don’t have a product key and activate it later.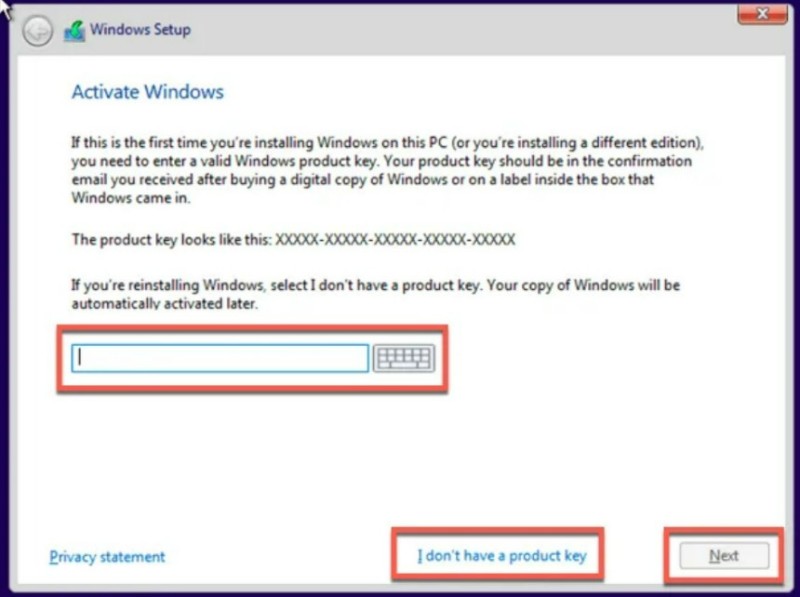
Step 4: Next, select the Windows 10 edition you want to install, then click on Next.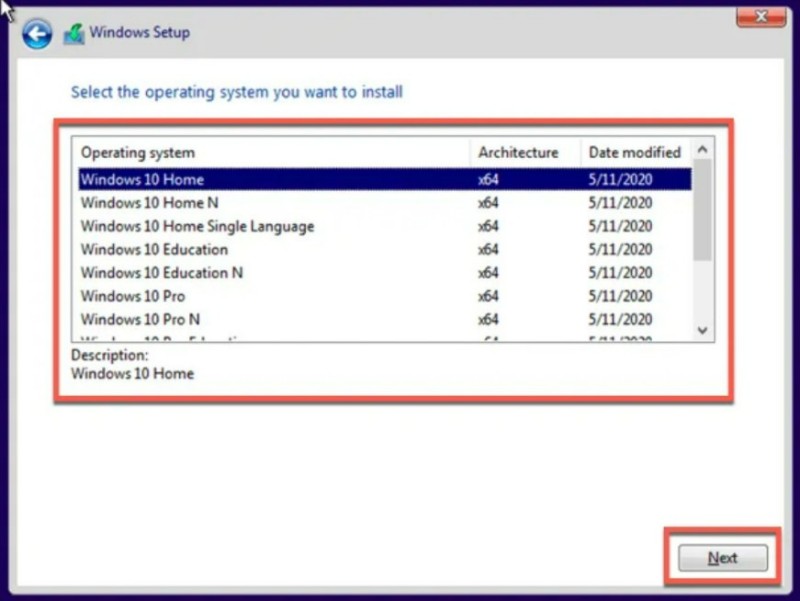
Step 5: You need to accept the Windows 10 license agreement. Click on the checkbox I accept the license terms, then click on Next to continue.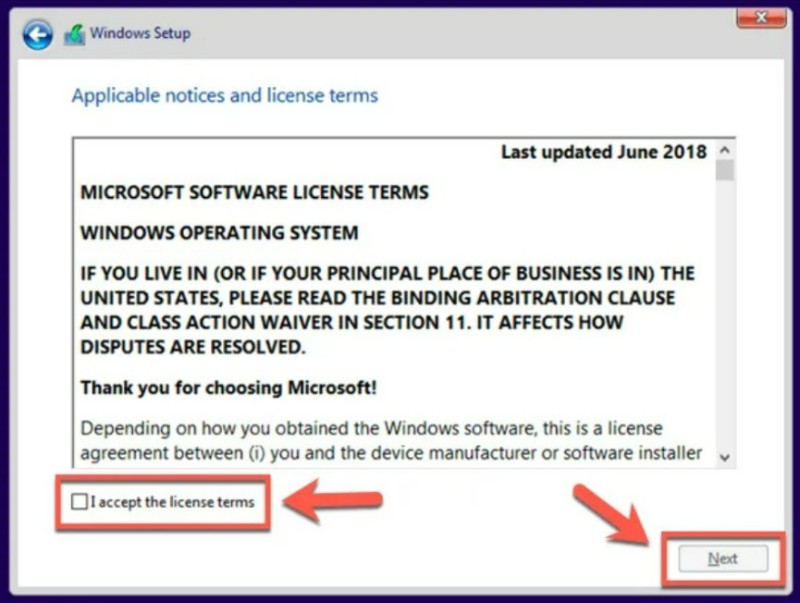
Step 6: In this screen, click on Custom: Install Windows only (advanced). This will delete all files on your PC before reinstalling Windows.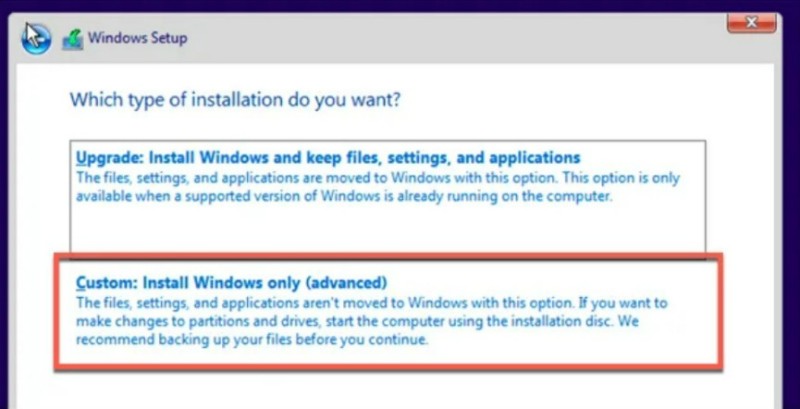
Step 7: Choose the disk to install Windows on in the next stage. Pay attention here to avoid any confusion with the data storage drive. Then click on Next to proceed.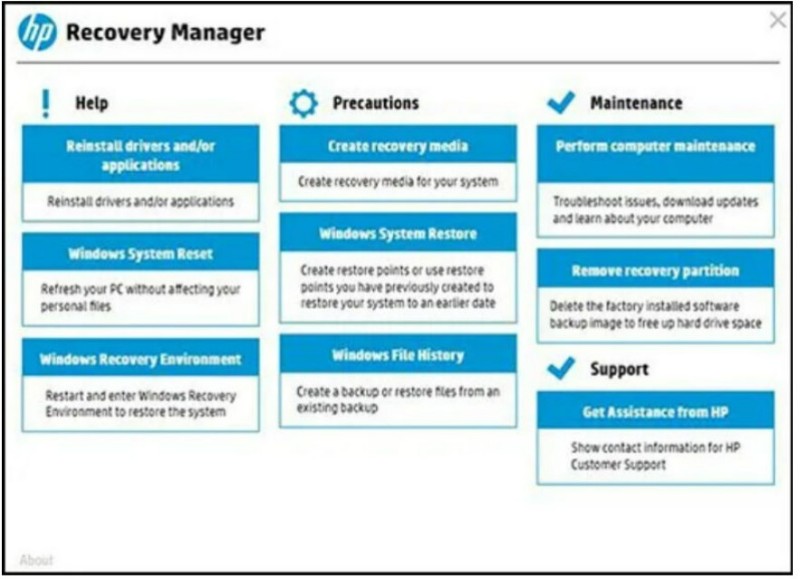
At this point, Windows will start erasing your disk and copying files for the fresh installation. Afterwards, Windows will restart to begin the next phase of the installation process, allowing you to create a new user account once the process is complete.
Resetting your admin password using the manufacturer’s recovery feature
Some PC and laptop manufacturers provide a special option to restore their Windows 10 installation to its original default state. This feature is usually activated by restarting the PC and pressing a specific key on the keyboard during the startup process. The key you need to press will vary depending on the device manufacturer. For example, some HP computers require you to press and hold the F11 key when starting up the PC. Each manufacturer has their own on-screen instructions on how to perform and activate this process. You can refer to your computer’s user manual to learn how to use the recovery feature and identify the key. Conclusion Now you know how to restore the default settings of Windows 10 and, if needed, perform a clean installation of Windows 10. Afterwards, you can set up a login password on your computer or skip this process if you feel it’s unnecessary. We hope this article helps you recover your computer for use, and if you have any questions or other feedback related to the article, don’t forget to leave your comments below.


