Removing Duplicate Rows in Excel Made Easy
Removing Duplicate Rows in Excel Made Easy. Excel is a versatile tool with many uses, from tracking inventory to creating sales reports. However, as your database grows, it’s common to encounter duplicate values and rows, which can lead to inaccuracies and mistakes. To prevent these issues, you’ll need to remove duplicates from your Excel sheet. Here’s how to do it with just a few clicks.
Option 1: Using the Remove Duplicate Rows Tool
Excel has a dedicated command for removing duplicates, making the process easy and quick. Here are the steps:
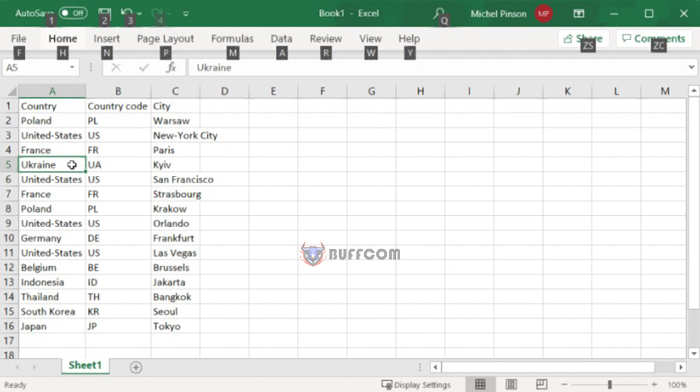
Select the cells you want to target, either entire rows or specific columns.
Click on the “Data” tab at the top of the screen.
Find and click on “Remove Duplicates” in the “Data Tools” group.
A small dialogue box will pop up on the screen. Ensure the “My data has header” option is selected if there is a header, otherwise deselect it.

Removing Duplicate Rows in Excel Made Easy
Press the “OK” button to remove duplicates.
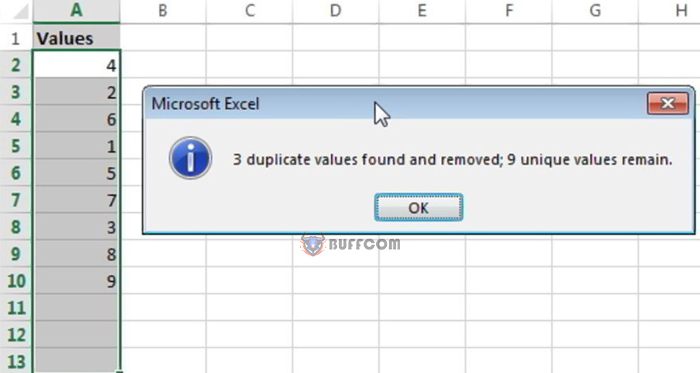
Excel will delete all duplicates, and the unique values remaining and the number of duplicate entries removed will be displayed. If you only want to remove duplicates based on specific columns, select those columns and deselect the rest before pressing OK.

Removing Duplicate Rows in Excel Made Easy
Remember to save your file beforehand, as the removal process is permanent. With this simple tool, you can quickly and easily ensure the accuracy and integrity of your Excel data.
Removing Duplicate Rows in Excel Made Easy
Option 2: Utilizing Advanced Filters in Excel to Remove Duplicate Rows
Removing Duplicate Rows in Excel Made Easy
Excel’s advanced filter feature is a useful tool for identifying and removing duplicates. It can be used in both the latest Microsoft Office suite and the 2003 version.
Removing Duplicate Rows in Excel Made Easy
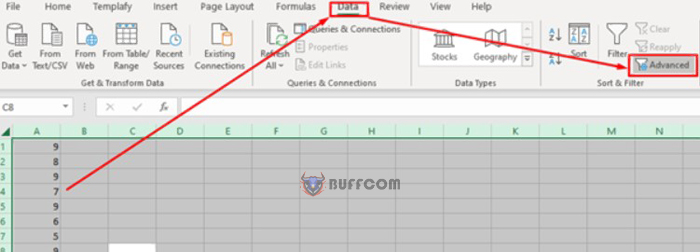
To start, open your Excel spreadsheet and select all by pressing Ctrl + A. Then, click on the Data tab and find the sort & filter section. Click on the advanced button.
Removing Duplicate Rows in Excel Made Easy
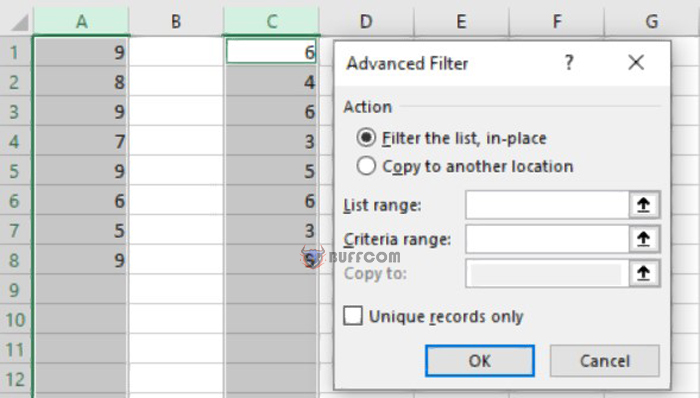
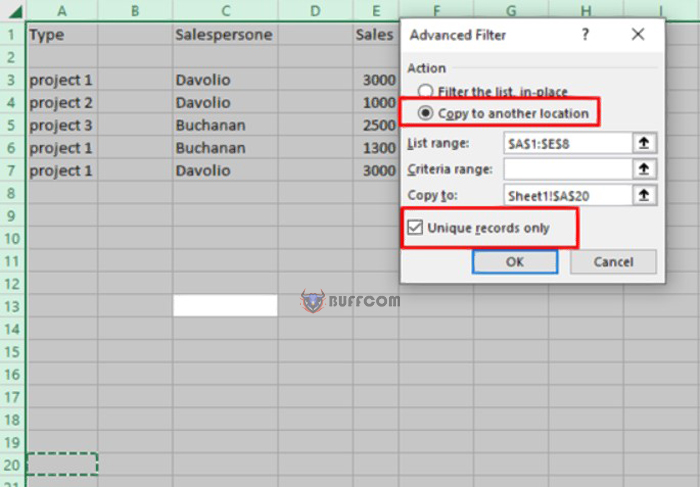
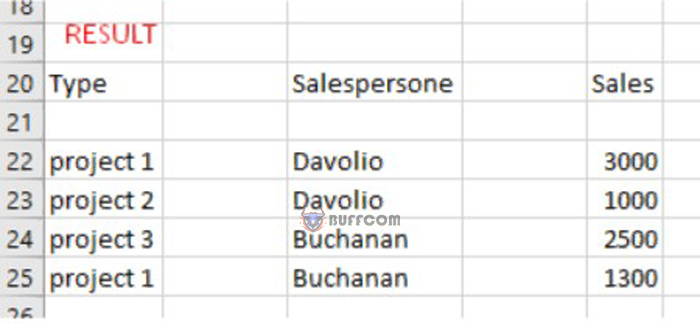
A dialog box will appear with two options: “copy to another location” or “filter the list in-place.” The former generates a copy of the records, while the latter hides all rows with duplicates.You can adjust the range of data by modifying the “list range” field in the dialog box. If you choose to filter the list in-place, leave the criteria range blank. Tick the “unique records only” box to filter out duplicates and retain unique entries.
Removing Duplicate Rows in Excel Made Easy
Once you’ve completed these steps, click the OK button to remove duplicates. Note that if the first row contains a duplicate, it will not be removed.
Removing Duplicate Rows in Excel Made Easy
Option 3: Using a Duplicate Remover Rows Tool with 2 Mouse Clicks
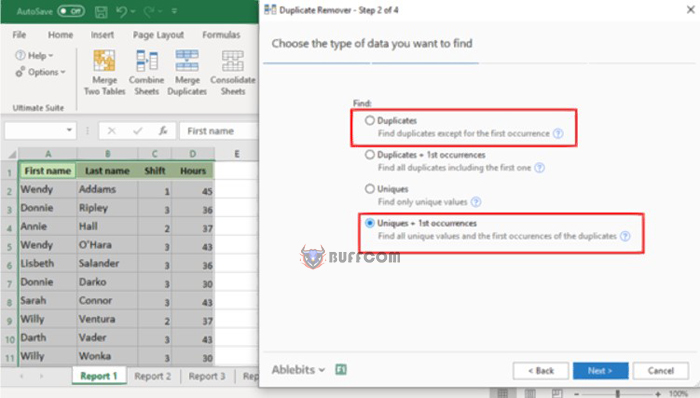
In addition to Excel’s built-in duplicate removers, you can use add-ons such as Ablebits Duplicate Remover. This tool is multi-purpose and can perform other functions as well. It works on all operating systems and Excel versions. To use the tool, select the cell in the table of interest and click “dedupe table” on the Ablebits data. This selects the entire table, and a dialog box will open with all columns chosen automatically.
Under the “select the action” field, choose the “delete duplicate” option from the drop-down list and press OK. The duplicate values will be deleted except for the first occurrences. This process can also be used to remove duplicates on specific rows under crucial columns by unchecking the other columns and leaving the ones you want to dedupe checked.
The select action can be used for other operations such as copying duplicates to another location without deleting them. Use the drop-down menu to select accordingly so that your Excel sheet is neat and without errors.
Removing Duplicate Rows in Excel Made Easy
In conclusion, removing duplicates in Excel is simple using the above options. Always clean your data set to eliminate any unprofessional errors. If you encounter any challenges, ensure that the data being processed is not subtotaled or outlined. If it is, remove the subtotals and outline before using any of the above methods. Your data will be cleaned, making it much easier to work on.


