How to Fix Font Errors in Word 2010 – 2016 (Updated 2022)
The topic of “How to Fix Font Errors in Word” is often searched for because the risk of font errors in Word versions arises from the failure to embed fonts into the text file when sending them from one computer to another. If you find yourself in this situation, what steps should you take to address it?
In this article, Buffcom.net will introduce you to a very simple way to fix this problem, applicable to Office 2010, Office 2013, Office 2016, and Office 2019…
Causes of Font Errors in Word
The phenomenon of font errors such as spelling mistakes, missing characters (especially those with diacritical marks), and characters encoded into strange symbols is not uncommon. The “culprit” causing the document to have font errors is mainly because the font used in the document is not compatible with the character set of the word processor on your computer, which often occurs when:
- Copying and pasting text from other sources or from the Internet
- Using a font that does not support Vietnamese or using a character set that is not compatible with the computer
- The computer does not have the font, so Word automatically selects a font that is not compatible with the character set being used
Steps to Fix Font Errors in Word (Applicable to Versions 2010, 2013, 2016, 2019)
Step 1: Select All Text (CTRL + A) Then Copy (CTRL + C)
(purpose: to save the contents of the text on the Clipboard)
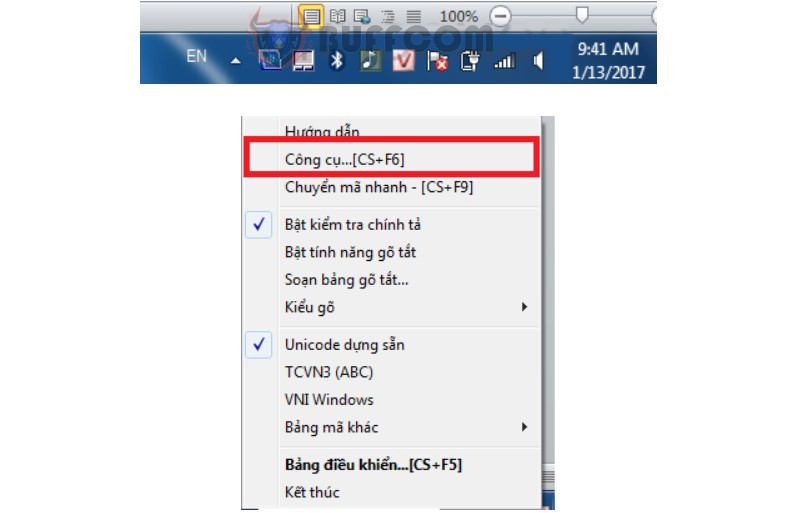
Step 2: Right-click on the Unikey icon on the toolbar and select Tool (CS + F6)
How to Fix Font Errors in Word
Step 3: Convert Encoding
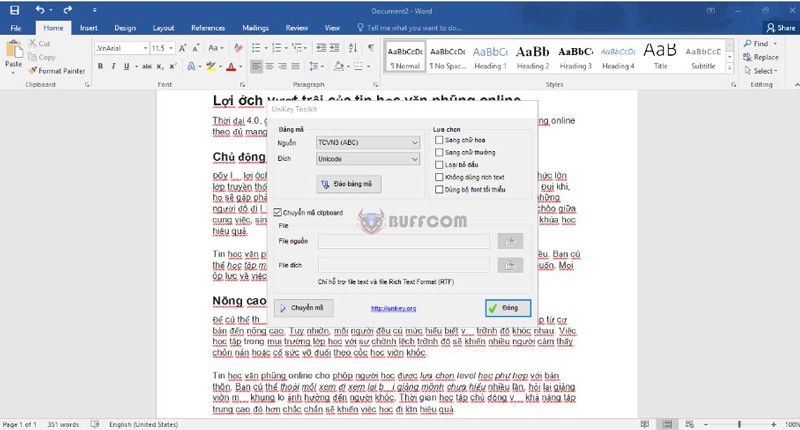
The Unikey Toolket window appears, where you can perform the following operations:
Encoding:
Source: Choose the encoding of the current font (for example: .VnTime font, source: TCVN3 – as illustrated)
Destination: Choose the encoding of the destination font (for example: Times New Roman font, destination: Unicode – as illustrated)
Tick the option “Convert clipboard encoding”
Click on “Convert”
How to Fix Font Errors in Word
When the Result window appears, it means that the operation has been successful (move to step 4)

How to Fix Font Errors in Word
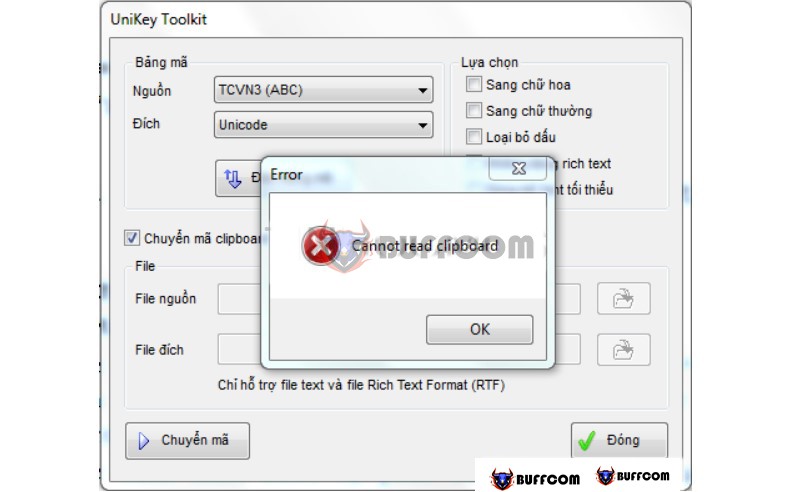
If you encounter any errors, as shown in the figure below, it may be because there is no content saved on the Clipboard.
Solution: perform the copy operation again for the text content.
How to Fix Font Errors in Word
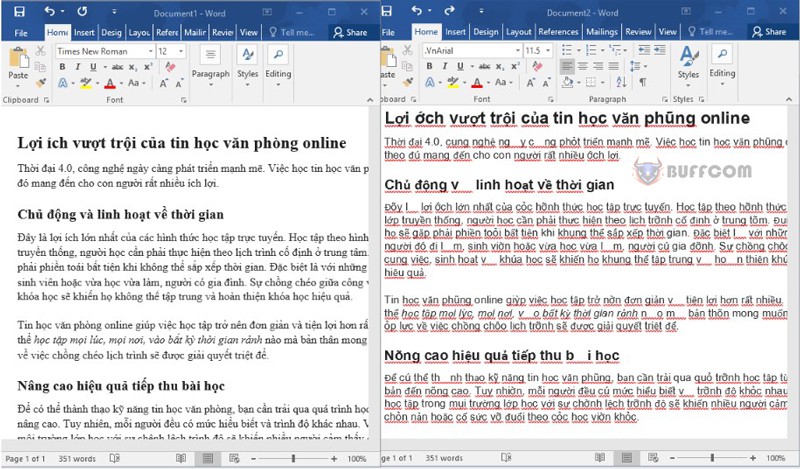
Step 4: Open a blank Word file, paste the selected content into it (CTRL + V)
How to Fix Font Errors in Word
The displayed content will be a new version of the document with the font error corrected (as shown on the left).
With these steps, you can quickly and easily fix font errors in Word.
Conclusion on How to Fix Font Errors in Word
In this article, the Buffcom.net has guided you through a simple and quick way to fix font errors in Word with three steps:
Select the Entire Text (CTL + A), Then Copy (CTRL + C)
Right-click on the Unikey Icon on the Toolbar and Select Tool (CS + F6)
Convert Encoding
Open a Blank Word File, Paste the Selected Content into it (CTRL + V)
In addition, if your work is related to office computing but the software you are using does not meet your needs, you can refer to the office products at Buffcom.net!


